00:29

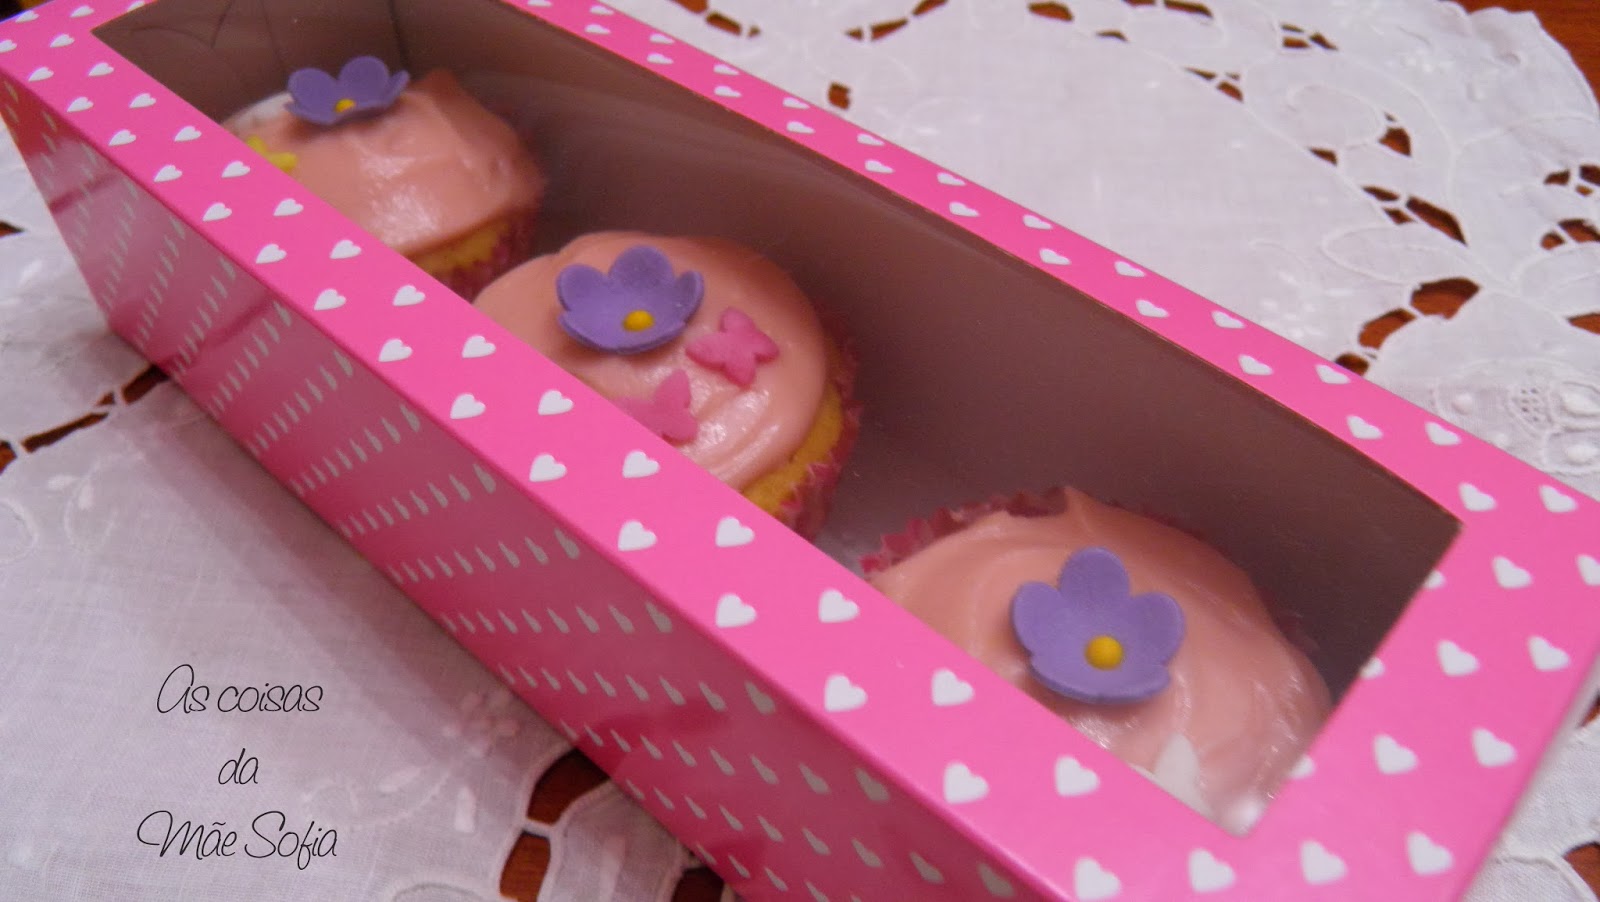
Cupcakes de limão / Lemon cupcakes

Cupcakes de limão / Lemon cupcakes
No passado dia 14 de Fevereiro, a minha filha, que adora dar prendas, pediu-me para fazer uns cupcakes especiais para oferecer no colégio. Foi a maneira dela comemorar o dia dos afectos e eu achei um gesto muito bonito da parte dela.
Sendo assim, lá foi a mãe magicar uma receita! Olhei para muitas receitas, mas nada me agradou. Então lá fui eu fazer experiências! A primeira experiência resultou nuns cupcakes duros, embora muito saborosos. Mas após umas modificações, resultou nestes cupcakes deliciosos, fofinhos, húmidos com uma cobertura deliciosa. Para além de visualmente bonitos, todos adoraram estes cupcakes.
Uma das ideias que tive foi fazer substituir uma parte da manteiga por queijo creme magro, para reduzir a gordura destes cupcakes, mas não perder em sabor. Ninguém vai perceber que foi usado queijo e o sabor é divinal!

Last February 14th, my daughter, who loves to give gifts, asked me to make cupcakes for a special offer at school. It was her way of celebrating Valentines Day and I found it a very nice gesture on her part.
I looked at many recipes, but nothing pleased me. So off I went to experiment! The first experiment resulted in some very heavy, but very tasty cupcakes. But after a few modifications, it resulted in some fluffy, moist with a delicious topping, cupcakes. Besides visually beautiful, everyone loved these cupcakes. 
One idea I had was to replace a portion of butter by cream cheese light, to reduce the fat in these cupcakes, but not losing out on flavor. No one will notice that was used cream cheese and the taste is divine!


CUPCAKES DE LIMÃO

Ingredientes:

para os cupcakes:
75g de farinha sem fermento
50g de farinha com fermento
150g de açúcar em pó
90g de queijo Philadelphia light
90g de manteiga à temperatura ambiente
1 colher de chá de raspa de limão
2 ovos
1 colher de chá de baunilha

para a cobertura:
90g de queijo Philadelphia light
30g de manteiga à temperatura ambiente
cerca de 1 colher de café de raspa de limão
245g de açúcar em pó
corante vermelho

Procedimento:
Pré-aquecer o forno a 180ºC. Forrar 10 formas de cupcakes com formas de papel.

Numa tigela, bater o queijo com a manteiga. Quando tiver uma mistura fofa, adicionar a raspa de limão, o açúcar, a baunilha e os ovos. Bater novamente. Peneirar as farinhas e adicioná-las à mistura anterior e misturar.
Distribuir a massa pelas forminhas de cupcakes e levar ao forno durante 20 minutos, ou até o palito sair seco.

para a cobertura:

Bater o queijo creme e a manteiga numa tigela. Adicionar a raspa de limão e um pouco de açúcar. Bater. Adicionar o restante açúcar aos poucos, batendo até se obter um creme suave e brilhante. Juntar o corante vermelho e mexer bem.
Quando os cupcakes estiverem frios, barrar a superfície com a cobertura ou aplicar com um saco de pasteleiro. Decorar a gosto.


LEMON CUPCAKES

Ingredients:

for the cupcakes:
75g plain flour
50g cake flour
150g icing sugar
90g of cream cheese Philadelphia Light
90g of butter at room temperature
1 teaspoon lemon zest
2 eggs
1 teaspoon vanilla

for the buttercream:
90g of cream cheese Philadelphia Light
30g of butter at room temperature
about 1 teaspoon of lemon zest
245g icing sugar
red candy color

Procedure:
Preheat oven to 180ºC. Line 10 cupcake tins with paper cupcake cups .
In a bowl, beat the cheese with the butter. When you get a fluffy mixture, add the lemon zest, sugar, vanilla and eggs. Mix again. Sift the flour and add it to the above mixture and mix.
Distribute the batter into the cupcakes paper cups and bake for 20 minutes or until toothpick comes out clean.

for the buttercream:

Mix cream cheese and butter in a bowl. Add the lemon zest and a little icing sugar. Mix. Add remaining sugar gradually, beating until you get a smooth and glossy cream. Add the red food coloring and stir well.
When the cupcakes are cooled, spread the buttercream over the cupcakes or apply it with a pastry bag. Decorate to taste.


23:59

Anéis de Chocolate & Baunilha / Chocolate & Vanilla Rings

Anéis de Chocolate & Baunilha / Chocolate & Vanilla Rings
Tal como prometido, aqui continua o desfile das guloseimas que sairam do meu forno no passado domingo. Hoje é a vez destes Anéis de Chocolate & Baunilha! Amanteigados, com um inconfundível sabor a baunilha e amêndoa, com um toque de chocolate.
Estas bolachas não demoraram muito a desaparecer! Embora possa parecer complicado, estas bolachas são relativamente fáceis de fazer e ainda mais fáceis de comer. O resultado final é lindo e são ideais para oferecer a alguém no dia de São Valentim.

As promised, here continues the parade of goodies that came out of my oven last Sunday. Today's turn belongs to these Chocolate & Vanilla Rings! Buttery, with a distinctive flavor of vanilla and almond, with a touch of chocolate. 
These cookies did not take long to disappear! While it may seem complicated, these cookies are relatively easy to make and even easier to eat. The end result is gorgeous and are ideal to offer someone on Valentine's Day.


ANÉIS DE CHOCOLATE & BAUNILHA
Adaptado do Livro: "For the love of cookies"

Ingredientes: (26 bolachas)
175g de manteiga à temperatura ambiente
125g de açúcar
1 colher de chá de baunilha
250g de farinha sem fermento
25g de Nesquick
25g de amêndoa ralada


Confeccção:

Colocar a manteiga e o açúcar numa tigela e bater com uma batedeira até se obter uma mistura fofa. Adiciona-se a baunilha, a farinha e amassa-se com uma colher de pau.
Divide-se a massa em duas porções iguais. A uma das metades adiciona-se o Nesquick, e à outra, adiciona-se a amêndoa ralada. Amassam-se bem cada metade até se obter uma massa homogénea, embrulham-se em película aderente e leva-se ao frigorífico durante 30 minutos.
Nesta altura, pré-aquece-se o forno a 180ºC e forram-se dois tabuleiros com papel vegetal.
Após os 30 minutos divide-se cada metade de massa em 26 pedaços iguais. Com um pedaço de chocolate e outro de baunilha fazem-se dois rolinhos com cerca de 12cm e entrelaçam-se. Unem-se as pontas, formando um anel, e coloca-se no tabuleiro. Procede-se da mesma forma até não haver mais massa.
Vão ao forno durante 12 minutos, ou até ficarem firmes, mas não douradas. Quando cozidas, retiram-se do forno e arrefecem-se em cima de uma rede.
Guardam-se numa caixa hermética... se conseguirem!!


CHOCOLATE & VANILLA RINGS
Adapted from the book: "For the love of cookies"

Ingredients: (26 cookies)
175g butter, temp room
125g sugar
1tsp vanilla
250g plain flour
25g Nesquick
25g ground almonds

Preparation:

Put the butter and the sugar in a bowl and mix with a stand mixer until fluffy. Add the vanilla, the flour and mix with a wooden spoon until you get a soft dough. Divide the dough in two equal parts and add the Nesquick to one half and the almonds to the other. Knead each piece of dough separately into a smooth ball, wrap in cling film and chill for 30 minutes.
Preheat the oven to 180ºC and line two baking sheets with parchment paper.
Divide each piece into 26 pieces. Take one chocolate and one vanilla pieces and roll each separately into ropes about 12cm long. Twist the ropes together to form a circlet and pinch the ends together. Repeat with the remaining dough and place on the baking sheets.
Bake for 12 minutes, or until firm, but not golden. Remove to cook on a wire rack.
Keep in a airtight box... if you can resist them!!


20:30

Tarteletes de limão / Lemon tartlets

Tarteletes de limão / Lemon tartlets
No passado domingo esteve um temporal de tal forma mau, que só convidava a ficar e casa. Convidava também a fazer iguarias deliciosamente docinhas. E foi exactamente isso que eu e a minha filha fizémos. Passámos a tarde a fazer bolachas, tarteletes e fizémos também um pão de alho e Parmesão para o nosso jantar (brevemente também aqui no blog).
A receita das bolachas virá amanhã, mas hoje vou apresentar-vos estas tarteletes que adaptámos de várias receitas que encontrámos escritas no meu livrinho de receitas, que são deliciosamente fáceis de fazer e ainda mais de comer :) Com um sabor delicado a limão, são cremosas e a base ficou com a textura ideal, firme e não excessivamente doce.

Last Sunday the weather was so bad, that we just wanted to stay home. With the such an ugly day we felt like baking, and so we did, me and my daughter. We spent the afternoon baking cookies, tartlets and also baked a garlic and Parmesan bread for our dinner (shortly here on the blog).
The cookies recipe will be posted tomorrow (don't miss it!), but today I will present you these tartlets that have adapted from several recipes that we found written in my little book of recipes that are deliciously easy to make and even more to eat :) With a delicate lemon flavor, are creamy and the crust has the ideal texture and isn't overly sweet.


TARTELETES DE LIMÃO 

Ingredientes: (4 tarteletes)

para a massa:
60g de manteiga gelada
1 ovo pequeno
140g de farinha
60g de açúcar
raspa de 1/2 limão

para o recheio:
2 ovos pequenos
80g de açúcar
50g de manteiga derretida
1 colher de sopa de farinha
raspa de 1/2 limão
sumo de 1 limão

Confecção:

massa:

Numa tigela trabalhar rapidamente com a ponta dos dedos todos os ingredientes da massa, fazer uma bola e colocar no frigorífico durante 1/2 hora.

recheio:

Bater os ovos com o açúcar, junta-se o sumo e a raspa de limão e bate-se novamente. Adiciona-se a farinha e a manteiga derretida e mexe-se até não haver grumos. Reservar.

montagem:

Pré-aquecer o forno a 180ºC.
Untam-se as formas de tarteletes com manteiga e forram-se com a massa e divide-se o creme pelas tarteletes. 
Levam-se as tarteletes ao forno durante 15 minutos ou até o centro já estar firme. Não devem dourar, senão ficam cozidas demais.
Quando estiverem frias, polvilham-se com açúcar em pó.


LEMON TARTLETS

Ingredients: (4 tartlets)

for the crust:
60g of cold butter
1 small egg
140g flour
60g sugar
zest of 1/2 lemon

for the filling:
2 eggs
80g sugar
50g melted butter
1 tablespoon of flour
zest of 1/2 lemon
juice of 1 lemon

Preparation:

crust:

In a bowl, work quickly with your fingertips all the ingredients of the crust, make a ball and place in refrigerator for 1/2 hour.

filling:

Beat the eggs with the sugar, add the lemon zest and juice and mix again. Add the melted butter and flour and stir until you have no more lumps. Reserve.

making the tartlets:

Preheat oven to 180ºC.
Grease the tartlets pans with butter and line with the dough. Divide the cream by the tartlets .
Bake the tartlets for 15 minutes or until the center is firm. They should not brown, or it will be over cooked.

When cooled, sprinkle with powdered sugar.


23:30

Cheesecake de Nutella super fácil / Easy peasy Nutella Cheesecake

Cheesecake de Nutella super fácil / Easy peasy Nutella Cheesecake
Dia 5 de Fevereiro comemorou-se o dia da Nutella. Pode parecer uma comemoração um pouco disparatada, mas a verdade é que a Nutella é um produto com um sabor fantástico e a minha filha adora-o. Visto que ela não é fã de outros doces e não são muitas as sobremesas que ela come, eu ajudei-a a comemorar este dia com este cheesecake que saiu das nossas duas cabecinhas :-)
O facto de ter desaparecido rapidamente, parece-me que é indicativo suficiente de que foi um sucesso! Além disso foi super rápido de fazer, super fácil e super delicioso!

February 5th is Nutella day. It may seem a silly celebration, but the truth is that Nutella is a product with a great taste and my daughter loves it. Since she is not a fan of other sweets and she is very picky about desserts, I helped her to celebrate this day with this cheesecake that we both made :-) 
The fact that it disappeared quickly, I think that is enough indication that it was a success! Also was super quick to make, super easy and super delicious!


CHEESECAKE DE NUTELLA SUPER FÁCIL

Ingredientes:

para a base:
1 pacote de bolacha Maria de 200g
cerca de 80 g de manteiga derretida

para a cobertura:
240g de queijo Philadelphia
200g de Nutella
nozes partidas para decorar

Colocar as bolachas dentro de um saco de congelação e esmagar com o rolo da massa (é nesta hora que pensamos naquela pessoa especialmente irritante). Deita-se dentro de uma tigela e mistura-se com a manteiga derretida.
Com a mistura de bolacha e manteiga forra-se o fundo de uma tarteira de fundo amovível, pressionado com as mãos de forma a ficar uma base compacta. Colocar no frigorífico durante 30 minutos.

Entretanto, numa tigela funda deita-se o queijo e a Nutella e bate-se com uma batedeira até se obter uma mistura cremosa. Deita-se este creme em cima da base de bolacha e alisa-se. Decora-se com a noz partida e volta ao frigorífico, onde deverá ficar durante hora e meia a duas horas.


EASY PEASY NUTELLA CHEESECAKE

Ingredients: 

for the crust:
1 package Maria biscuit (200g) 
about 80 g of melted butter 

for the cream:
240g of Philadelphia cream cheese 
200g Nutella 
chopped walnuts to decorate 

Place the Maria biscuits in a freezing bag and crush with a rolling pin (this is the time to think on that especially annoying person). Place in a bowl and mix with the melted butter. 
Press with your hands the Maria biscuit and butter mix on the bottom of a cheesecake pan and place in the in the fridge for 30 minutes. 


Meanwhile, in a deep bowl mix the cheese and Nutella with an electric mixer until the mixture is creamy. Pour the cream on top of the crust and smooth it. Garnish with walnut and put it back in the refrigerator, where it will stay for an hour and a half to two hours.


18:17

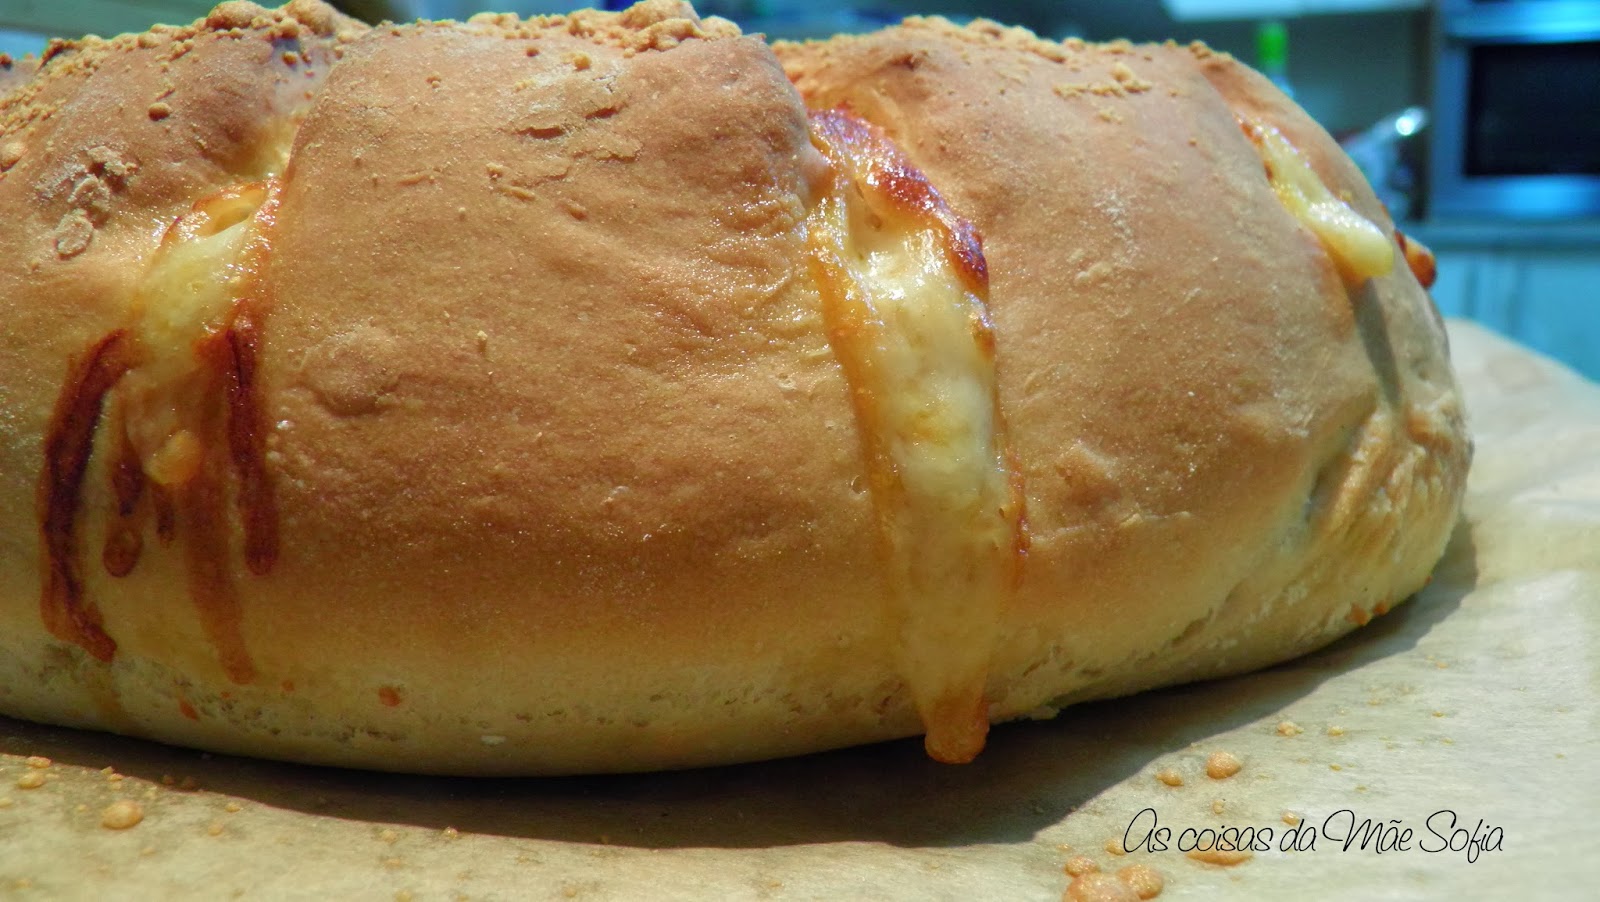
Pão com recheio de pizza / Pizza bread

Pão com recheio de pizza / Pizza bread
Um dia destes, estava quase na hora de ir buscar os meus filhos ao colégio, e eu para fazer tempo, passeava pelo Pinterest quando vi uma foto muito sugestiva. Tentei abrir a página, mas o Google Chrome não gostou, desligou-se subitamente e eu não consegui ver a receita. Saí de casa com aquela ideia na cabeça (Sim! Eu penso muito em comida!) e, quando voltei, ainda tentei procurar a receita mas não encontrei. Ora se não encontro.... invento! Pois foi o que fiz e saiu um jantar delicioso, do qual não sobrou nada a não ser 3 fatias que eu pus de parte para o almoço do dia seguinte das crianças.
Curiosos para saber a receita? Então aqui vai!

One of these days, it was almost time to pick up my kids from school, and I was lurking around Pinterest when I saw a very suggestive picture. I tried to open the page, but Google Chrome didn't like it, closed suddenly and I could't see the recipe. I left home with that idea in mind (Yes! I think a lot about food!) And when I returned, still tried to search for it but could't find the recipe. If I can't find it .... I will make one of my own! Let me just tell you that it made a delicious dinner, which disappeared  except for 3 slices that I put aside for my kids lunch the next day. 
Curious to read the recipe? So here goes!


PÃO COM RECHEIO DE PIZZA

Ingredientes:

para a massa:
4 copos de farinha de trigo sem fermento
1 e 1/2  copos de água morna
1 pitada de sal
3 e 1/2 colheres de chá de fermento seco para pão
2 colheres de sopa de xarope de agave
4 colheres de sopa de azeite

para o recheio:
molho de tomate qb
pimento vermelho
fiambre
chouriço
queijo mozzarela ralado
queijo Parmesão
azeitonas verdes com recheio de pimento
oregãos


Procedimento:
Começa-se por misturar a água morna com o xarope de agave e polvilha-se com o fermento seco. Enquanto a mistura repousa, mistura-se a farinha com o sal numa tigela grande da máquina de amassar. Junta-se o azeite à mistura do fermento e adiciona-se à farinha.
Amassar até que a massa fique toda presa ao gancho da máquina de amassar. Nessa altura deita-se a massa numa superfície enfarinhada e amassa-se à mão durante 2 minutos. Coloca-se a massa numa tigela enfarinhada e cobre-se com película aderente e, posteriormente, por um cobertor. Deixa-se levedar até que dobre de volume (+/- 1 hora).

Quando a massa tiver dobrado de volume deita-se numa superfície enfarinhada e estica-se até se obter um rectângulo com cerca de 1 centímetro de altura. Espalha-se o molho de tomate, e os restantes ingredientes pela massa. Pegando no lado mais largo da massa enrola-se de forma a ficar com um rolo. Unem-se as extremidades do rolo formando um círculo. Com uma tesoura de cozinha fazem-se uns cortes e polvilha-se com queijo Parmesão.

Cobre-se com um pano e deixa-se repousar num local sem correntes de ar durante meia hora. 
Pré-aquecer o forno a 200ºC.

Levar ao forno durante 20 a 25 minutos, ou até ficar dourado. Deixar repousar fora do forno durante 5 minutos e fatiar.


PIZZA BREAD

Ingredients:

for the dough:
4 cups of all purpose flour
1 and 1/2 cup of warm water
1 pinch of salt
3 and 1/ 2 teaspoons dry yeast
2 tablespoons agave syrup
4 tablespoons olive oil

for the filling:
tomato sauce
red pepper
ham
chourizo
grated mozarella cheese
grated Parmesan cheese
green olives stuffed with pimento
oregano


Procedure:

You start by mixing warm water with agave syrup and sprinkle it with the dry yeast. While the mixture rests, mix the flour with the salt in the bowl of a kitchen stand mixer. Add the olive oil to the yeast mixture and pour over the flour.
Knead until the dough attaches to the hook of the kitchen stand mixer. Knead the dough by hand for 2 minutes on the floured countertop.  Place the dough onto a lightly floured bowl, cover with cling film and with a blanket. Allow to rise until it doubles in volume (+/- 1 hour).

When the dough has doubled in volume place it on a floured board and stretch it until you get a rectangle about 1 cm high. Spread the tomato sauce and the remaining ingredients over the dough. Taking the broad side of the dough, roll it up and unite the ends in order to form a circle. With kitchen scissors make a few cuts and sprinkle with Parmesan cheese.

Cover with a cloth and let it rest in a draft-free place for half an hour.
Preheat oven to 200ºC.

Bake for 20-25 minutes or until golden. Let it rest for 5 minutes and slice.


22:44

Mas afinal o que é o Gang dos Frescos?

Mas afinal o que é o Gang dos Frescos?
A esta altura já devem ter percebido que fui uma das seleccionadas para ajudar a difundir este projecto do Lidl, o Gang dos Frescos, que tem como objectivo estimular o consumo de legumes e fruta, sendo o público alvo as crianças.


Desde 9 de Janeiro que o Lidl, em parceria com a Direcção Geral de Saúde, realiza um Road Show em 30 escolas do ensino básico, de forma a mobilizar os alunos a adoptarem hábitos de alimentação saudáveis.
Paralelamente o Lidl promove também um passatempo, no qual todas as esocla do páis são desafiadas a criar cartazes que incentivem o consumo de frutas e legumes frescos. Tem também passatempo que decorrem em plataformas digitais com quizzes pedagógicos e divertidos.

Para terem acesso a estes queridos frutos e legumes, os clientes do Lidl são convidados a preencher uma caderneta do Gang dos Frescos, que poderão trocar pela pera, morango, banana, beringela, alho, cenoura e pelo brócolo. Algumas lojas serão também animadas com a presença de frutas e legumes gigantes, com as quais as crianças interagem, recebendo brindes e livros de receitas do Gang dos Frescos.

Ora o Lidl, quis ir um pouco mais longe e desafiou a um grupo de bloggers (eu incluída) a criar receitas com os legumes/frutas que nos iriam enviar. Já devem ter deduzido que a mim me calhou o morango e a beringela!
Todas as receitas criadas neste âmbito, serão sujeitas a votação no Facebook do Lidl Portugal pelos seus seguidores e pelo Chef Hernâni Ermida. Por isso, peço-vos que a partir do dia 27 de Janeiro passem por lá e votem nas minhas receitas, e eu ficarei muito grata pelo vosso gesto.

Entretanto irei continuar a brindar-vos com novidades deliciosas que entretanto se foram fazendo por aqui. 


00:14

Gang dos Frescos - Caracóis de Morango / Fresh Gang - Strawberry Rolls

Gang dos Frescos - Caracóis de Morango / Fresh Gang - Strawberry Rolls
Ia eu fazer uns caracóis de canela para o pequeno almoço de amanhã, quando me lembrei que podia variar e fazer um recheio diferente e mais saudável. Inspirada pelo Morango do Gang dos Frescos, fiz estes caracóis com recheio e glacé de morango. São uma excelente e deliciosa alternativa à versão tradicional e esta receita tem a vantagem de não levar ovos.
Quem se atreve a experimentar?


I was going to make some cinnamon rolls for tomorrow's breakfast, when I remembered that could vary and make a different and healthier filling. Inspired by the Strawberry from the Fresh Gang, I bakes these rolls with strawberry filling and frosting also made from the strawberry juice. They are an excellent and delicious alternative to the traditional version and this recipe has the advantage of being eggs free. 
Who dares to try?


CARACÓIS DE MORANGO

Ingredientes:
1 1/4 de copo de água morna
2 1/4 colher de chá de fermento biológico seco
1/2 copo de xarope de agave
2 colheres de manteiga derretida
2 colheres de chá de baunilha
4 copos de farinha sem fermento (pode ser preciso mais)
1 pitada de sal

para o recheio:
2 copos de morangos frescos cortados em pedaços pequenos
3 colheres de açúcar
1 colher de chá de baunilha

para o glacé:
2 colheres de sopa cheias de sumo de morango (retirar da mistura do recheio)
cerca de 6 colheres de sobremesa de açúcar em pó

Numa tigela polvilhar o fermento sobre a água morna. Adicione o agave, a manteiga derretida, a baunilha e 1 copo de farinha. Amassar até se obter uma mistura homogénea. Adicione a restante farinha aos poucos e o sal. Amassar até se obter uma massa macia que não se cola às mãos. Deixar levedar durante 2 horas.

Noutra tigela misturar os ingredientes do recheio, tapar e guardar no frigorífico enquantto a massa está a levedar.

Quando a massa estiver pronta, esticar em forma de rectângulo. Retirar o recheio dos morangos do frigorífico, retirar o sumo necessário para o glacé e esmagar os morangos com um garfo. Espalha-se esta mistura pelo rectângulo de massa e faz-se um rolo.
Cortar em 12 pedaços iguais e colocar num tabuleiro untado com manteiga.
Deixar levedar em local quente durante 50 minutos.
Pré-aquecer o forno a 180ºC. Passados os 50 minutos, assar durante 20 minutos, ou até ficarem dourados.

Misturar o açúcar em pó com o sumo reservado até se obter um glacé espesso e brilhante. Deitar o glacé em cima dos caracóis de morango enquanto estão quentes.


STRAWBERRY ROLLS

Ingredients:
1 1⁄4 cup warm water
2 1⁄4 tsp dry yeast
1/2 cup agave syrup
2 tablespoons of melted butter
2 tsp vanilla
4 cups flour (you may need more)
a pinch of salt

for the filling:
2 cups of strawberries chopped into small pieces
3 tablespoons of sugar
1 tsp vanilla

for the glaze:
2 tablespoons of strawberrie juice (taken from de filling)
6 dessertspoons of icing sugar

In bowl, sprinkle yeast over warm water.  Add agave syrup, melted butter, vanilla, and 1 cup of flour. Mix until you get a smooth batter. Add remaining flour, little by little, and the salt.  Knead and let rise for 2 hours.

Mix the ingredients from the filling, cover put in refrigerator while dough rises.

When the dough is ready, roll out the dough until you get a rectangle. Mash the strawberries, then drain 1/4 cup of the juice, set aside and reserve for frosting.  Spread filling evenly over dough.  Roll up the dough. Cut into 12 equal pieces and place roll pieces in a greased square pan. Let the dough rise for 50 minutes. Bake at a preheated oven at 180ºC for 20 minutes.
Mix the strawberry juice with the icing sugar until you get a thick and glossy glaze. Drizzle over the warm strawberry rolls.


19:43

Gang dos Frescos - Queques de morango / Fresh Gang - Strawberry muffins

Gang dos Frescos - Queques de morango / Fresh Gang - Strawberry muffins
Quando decidi aceitar o desafio e participar no projecto "Gang dos Frescos", nunca imaginei que iria receber o Morango. O Morango é a fruta preferida da minha família, principalmente da minha pequenita. Por isso, desde que o Vitarolas, o Morango, chegou cá a casa, eles são inseparáveis!
Para esta receita, pensei em qual seria a melhor combinação de ingredientes e com a ajuda dos meus filhos, chegámos à conclusão que os melhores amigos do Morango são o chocolate e o chantili. E assim nasceram estes queques deliciosos para o lanche. Húmidos, leves e deliciosos, ficam fantásticos com uma cobertura de chantili e morango. Mas deixemo-nos de conversa e passemos à receita!

When I decided to accept the challenge and participate in the "Fresh Gang" project, I never imagined it would get the Strawberry. The Strawberry is my family favorite fruit, especially of my little girl. Therefore, since the Vitarolas, The Strawberry, arrived, they are inseparable! 
For this recipe, I thought about what would be the best combination of ingredients and with the help of my kids, we concluded that the Strawberry best friends are the chocolate and whipped cream. And so I baked these delicious cupcakes. Moist, light and tasty, are fantastic with a toppingr of whipped cream and strawberry. But enough with the talk and let's move on to the recipe!


QUEQUES DE MORANGO

Ingredientes:
200g de morangos cortados em pedaços pequenos
280g de farinha sem fermento
1 colher de sopa de fermento em pó
1 pitada de sal
120g de açúcar 
2 ovos
250ml de queijo fresco batido sem gordura
85g de manteiga derretida
1 colher de chá de extracto de baunilha
80g de pepitas de chocolate
200ml de natas para bater + açúcar a gosto
morangos para decorar

Pré aquecer o forno a 200ºC.
Bater as natas em chantili e guardar no frigorífico
Untar as formas de queques com manteiga e reservar.
Colocar numa tigela a farinha, o fermento, o sal e o açúcar e misturar. Juntar os morangos e as pepitas de chocolate e envolver rapidamente.
Numa outra tigela, bater os ovos com o queijo fresco batido, a manteiga derretida e o extracto de baunilha.
Adicionar os ingredientes líquidos aos secos e misturar rapidamente e com cuidado.
Distribuir a massa pelas formas de queques e levar ao forno durante 15 minutos, ou até ficarem dourados. Retirar do forno e deixar repousar nas formas durante 5 minutos. Não retirar os queques das formas de imediato pois estão muito macios ao sair do forno e irão partir-se.
Colocar o chantili num saco de pasteleiro com boquilha larga, cobrir os queques e decorar com fatias de morangos.


STRAWBERRY CUPCAKES

Ingredients:
200g strawberries cut into small pieces
280g plain flour
1 tablespoon of baking powder
1 pinch of salt
120g sugar
2 eggs
250ml of fat free quark
85g melted butter
1 teaspoon vanilla extract
80g chocolate chips
200ml whipping cream + sugar to taste
strawberries to decorate

Preheat oven to 200 º C.
Whisk the cream into whipped cream and refrigerate
Grease muffin tins with butter and reserve .
Place in a bowl the flour, baking powder, salt and sugar and mix. Add the strawberries and the chocolate chips and mix gently.
In another bowl, beat the eggs with the quark, melted butter and vanilla extract .
Add the liquids to the dry ingredients and mix quickly and carefully .
Spoon the batter into the muffin tins and bake for 15 minutes or until golden. Remove from oven and let it rest for 5 minutes in the muffin tins. Do not remove the cupcakes from the tins immediately as they are very soft out of the oven and they will break.
Place the whipped cream in a pastry bag with a large nozzle, cover the muffins and decorate with sliced ​​strawberries.


14:50

Projecto "Gang dos Frescos" e um convidado muito especial / "Fresh Gang" Project and a very special guest

Projecto "Gang dos Frescos" e um convidado muito especial / "Fresh Gang" Project and a very special guest
Durante o mês de Janeiro a conhecida superfície comercial Lidl desafiou-me a criar receitas à base de frutas e legumes. Nesta receita que apresento hoje, o convidado especial que apareceu para o almoço é o Brinjola (foi assim que os meus filhos o baptizaram), que veio provar o meu hamburguer de beringela.
Esta receita já está presente aqui no blog e este hamburguer é tão suculento e tão saboroso, que nos esquecemos que do tradicional hamburguer de carne. Gostam os meus filhos e gostou também o Brinjola.


During the month of January the store Lidl challenged me to create recipes based on fruits and vegetables. In this recipe I offer today, the special guest who came for lunch is Brinjola (that's how my children named him), which has tasted my eggplant burger. 
This recipe is already present here on the blog and this burger is so juicy and so flavorful, that we forget the traditional beef burger. Like my children, Brinjola also lloved this burguer.


HAMBURGUER DE BERINJELA

Ingredientes:
(para 3 hamburgueres)
1 beringela descascada e cortada aos cubinhos
1 chalota picada
1/3 de copo de queijo mozzarella
2 colheres de sopa de Parmesão
1/2 copo de pão ralado
1 dente de alho picado
sal e pimenta
1 colher de sopa de oregãos frescos picados
3 colheres de sopa de azeite

Saltear a beringela em 2 colheres de azeite até ficar macia. Colocar numa tigela com o resto dos ingredientes (excepto o azeite), misturar e levar ao frigorífico durante 1/2 hora. Ao fim desse tempo, moldar os hamburgueres e fritar no azeite restante. Servir dentro do pão de hamburguer.


EGGPLANT BURGUER

Ingredients:
(makes 3 burguers)
1 eggplant peeled and cut into little cubes
1 scallion chopped
1/3 cup of mozzarella cheese
2 tablespoons of Parmesan cheese
1/2 cup of bread crumbs
1 garlic clove minced
salt and pepper
1 tablespoon of minced fresh oregano
3 tbs of olive oil

Sauté the eggplant in 2 tablespoons of olive oil until soft. Put the eggplant in a large bowl and add the remaining ingredients (except for the olive oil), mix everything and let it rest in the fridge for 1/2 hour. Make 3 burguers and sauté in a frying pan with the rest of the olive oil. Serve with burguer buns. 


16:31

Tarte de iogurte de morango / Strawberry yoghurt tart

Tarte de iogurte de morango / Strawberry yoghurt tart
Esta tarte deliciosa e cremosa resulta da necessidade de fazer uma sobremesa em pouco tempo e com poucos ingredintes. É ideal para aquelas situações em que temos visitas de última hora e queremos oferecer algo. Até as crianças podem fazer esta tarte de tão simples que é :)

This delicious and creamy tart was created from the need to make a dessert in little time and with only a few ingredients.  It's ideal for those situations where we have last minute visits and want to offer something. It's so simple that even children can make this tart :)


TARTE DE IOGURTE DE MORANGO

Tempo de preparação: 30 minutos
Dificuldade: Fácil
Vegetariano: Não
Apto para crianças
Ingrediente principal: Massa folhada, Mascarpone, Iogurte de pedaços de morango
Para 6 pessoas
Prato: Sobremesa

Tipo de cozinha: Pastelaria

Ingredientes:
1 massa folhada redonda Light Continente
1 embalagem de mascarpone Continente
4 colheres de sopa de açúcar
2 iogurtes de pedaços de morango Light Continente
3 ovos

Pré-aquecer o forno a 180ºC. Forrar uma tarteira com a massa folhada e reservar.
Numa tigela bater o mascarpone com o iogurte de pedaços, até se obter um creme suave. Juntam-se os ovos e o açúcar e bate-se bem.
Verter a mistura de iogurte para a tarteira forrada com a massa folhada e levar ao forno durante 20 a 25 minutos, ou até a tarte se apresentar dourada e firme no centro.
Deixar arrefecer e polvilhar com açúcar em pó.


YOGURT STRAWBERRY TART

Preparation time: 30 minutes
Difficulty: Easy
Vegetarian: No
Suitable for children
Main Ingredient: Puff pastry, mascarpone, yogurt strawberry pieces
For 6 people
Course: Dessert
Type of cuisine: Pastry

Ingredients:
1 round puff pastry
1 package of mascarpone cheese
4 tablespoons of sugar
2 Light strawberry yogurts
3 eggs

Preheat oven to 180ºC. Line a tart pan with the puff pastry and reserve.
In a bowl beat the mascarpone and yogurt, until you get a smooth cream. Add the eggs and sugar and mix well.
Pour the yoghurt mixture into the lined tart pan and bake for 20 to 25 minutes, or until golden and the filling is firm in the center.
Cool and sprinkle with powdered sugar.


Copyright © 2016 As coisas da Mãe Sofia , Blogger